A sidewalk violation notice from the New York City Department of Transportation (DOT) is easy to panic over — and easy to misunderstand. In most cases it is not a fine you simply pay and forget. It is an official record that the sidewalk next to your property has a defect that needs to be corrected, and it stays open until the City is satisfied that the repair has been done properly.
NYC DOT sidewalk violation dismissal follows a clear sequence: understand what was cited, fix it to DOT specifications under the right permit, and then have DOT come back and verify the work. Skip a step, do the repair out of order, or leave the finished work uninspected, and the violation can remain open even after you have spent money on concrete. This guide walks property owners through each step in order.
One caution before you start: details such as response dates, costs, and procedures can vary by notice and by property, so always check your own notice and confirm current requirements with DOT. Nothing in this guide guarantees a particular outcome — dismissal depends on the corrected condition passing inspection.
Step 1: Read the Violation Notice Carefully
Start with the paper, not the pavement. The notice identifies the property, the location of the sidewalk in question, and the defects the inspector observed. Read every line and note exactly which conditions were cited — for example, a raised or uneven flag, cracking, a trip hazard, improper slope, or a patch or surface problem. The location matters just as much as the defect: a notice may cover only part of the frontage, specific flags, or a section near a tree, curb, or driveway.
Keep the notice somewhere safe and share a copy with anyone you ask to price or perform the work. Check the notice itself for any dates, instructions, or contact information DOT gives for your case, rather than relying on dates you have heard from a neighbor or read online. If anything on the notice seems wrong — the wrong frontage, a defect you cannot find, or work you believe was already corrected — raise that question early, before money is spent, using the contact route shown on the notice or through DOT.
Two facts on the notice matter more than most owners realize. First, a sidewalk violation carries no fine by itself — the financial risk is not a ticket, it is what happens if the repair is never made. Second, the clock: owners generally have 75 days from the notice to complete the repairs. If the defects are still there after that window, the City can arrange the repair itself and bill the property owner for the cost, and that charge can become a lien on the property. The 75 days also matter if you believe the notice is wrong, because that is the window for requesting a re-inspection, covered below.
How to look up a sidewalk violation on your property
You do not have to wait for a notice in the mail to know where you stand. Sidewalk violations are a matter of public record: you can check a property through NYC311 and DOT’s violation records using the property address or its block and lot numbers, and the violation number on any notice ties the record to your case. Owners check before a repair, of course — but buyers and their attorneys also run this search before a purchase closes, because an open violation transfers with the property. If you are selling, an undismissed violation from years ago can surface at exactly the wrong moment, which is one more reason to close the loop formally instead of assuming a finished repair closed it.
Step 2: Photograph and Document the Current Condition
Next, document what the sidewalk actually looks like today. Photograph the full frontage from a distance, then photograph each cited flag up close, including the joints, edges, and any change in level. A tape measure or a straight edge in the frame can help show scale. Take pictures from more than one angle, and keep the original files with their dates intact.
Write a short set of notes to go with the photos: which flags are affected, where each defect sits in relation to the building, tree pit, curb, or driveway, and whether the condition seems to be getting worse. This record protects you in two ways. It gives a contractor a clear starting point for scoping, and it creates a before-and-after record if there is ever a question about what was repaired.
Step 3: Check Whether the Damage Is From a City Tree
Before you assume the repair — and the cost — are entirely yours, look at whether a City tree is involved. Roots from a street tree can lift or crack sidewalk flags, and damage linked to a City tree can follow a different responsibility and repair path than damage caused by age, wear, or a private tree on your own property.
Check the notice and the site itself: is there a street tree next to the damaged flags, and does the lifting line up with its roots? Do not cut roots, remove a tree, or grind down a raised flag around a tree on your own initiative — work affecting a City tree is handled through the City, and the wrong move can create a new problem. If tree damage looks likely, ask DOT or the City forestry side, as directed on your notice, how that section should be handled before you scope the rest of the repair.
Step 4: Get the Repair Scoped and Hire a Contractor Who Works to DOT Specifications
With the defects mapped, have the work scoped properly. A good scoping visit works flag by flag: which flags need full replacement, which — if any — can be addressed another way, what the underlying base looks like, and how the finished surface will meet the neighboring flags and the curb. Get the scope in writing, tied to the defects on the notice, so you can compare proposals on the same basis.
Hire a contractor who regularly works to DOT specifications and understands the dismissal process, not just concrete work in general. Our sidewalk and driveway services in New York cover violation repairs from inspection through re-inspection, and owners in the Bronx can see how that work is handled locally on our page for sidewalk and driveway contractors in Jerome Park. Ask any contractor you consider how they handle permits, specifications, and the re-inspection request — clear answers are a good sign.
Step 5: Get the DOT Permit Before Work Starts
Sidewalk work in the public right-of-way generally requires a DOT permit before work begins. The permit ties the work to the property and the scope, and it is part of the paper trail that connects your repair to the open violation. Starting work first and sorting out the permit afterward is one of the most common — and most avoidable — causes of delay.
Your contractor will usually handle the permit application as part of the job, but as the owner you should confirm that the permit is in place before demolition or pouring starts, and keep a copy with your violation notice. Check the notice and DOT for the current permit requirements for your type of work, since requirements can differ depending on what is being repaired and where.
Step 6: Complete the Repairs to DOT Specifications
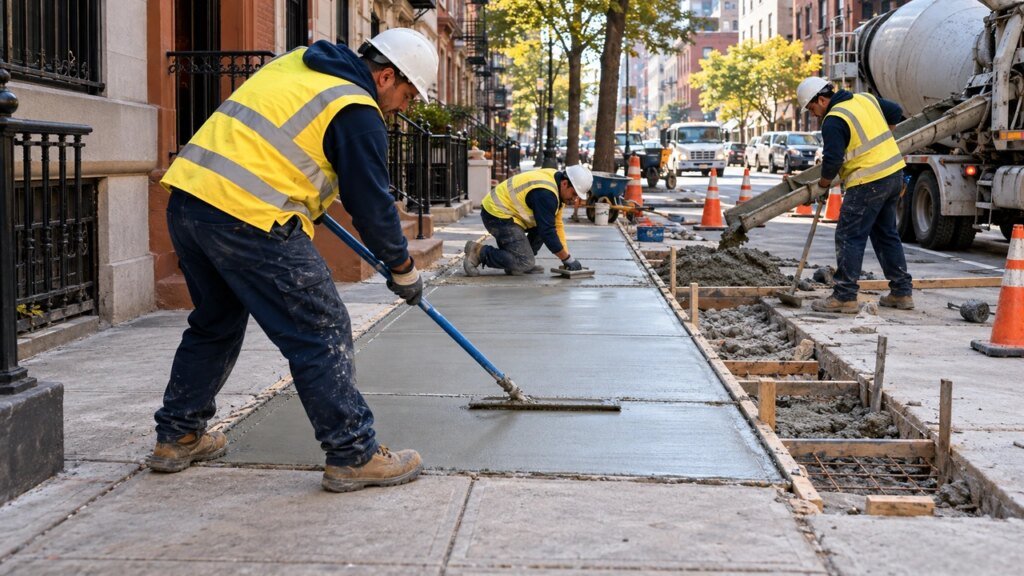
The repair itself has to match what DOT will look for at re-inspection. In practice, that usually means replacing the full affected flags rather than patching over a defect, building on a properly prepared base, and finishing the new concrete at the correct grade so water drains sensibly and the surface sits even with the flags around it. Joints should be clean and properly placed, edges should line up, and there should be no new lip or step where old and new concrete meet.
Resist shortcuts. A thin patch, a partial-flag fix where a full flag is needed, or grinding that leaves the surface out of tolerance may look better for a few weeks, but it is unlikely to satisfy an inspector who is comparing the finished work against the cited defects. If extra damage is found once old concrete is removed, deal with it while the sidewalk is open rather than covering it up.
It helps to know the actual measurements an inspector works to. A trip hazard is generally a vertical difference of half an inch or more between flags. Expansion joints are expected at property lines, where the sidewalk meets the curb, and at intervals of no more than about 20 linear feet along the run. Concrete thickness is specified too — about 4 inches for a standard walk and about 7 inches where vehicles cross, such as driveway aprons. A repair scoped to those numbers from the start is a repair that passes.
Step 7: Request a DOT Re-Inspection (Dismissal Inspection)
A finished repair does not close a violation on its own. Once the work is complete and the concrete has cured, a re-inspection — often called a dismissal inspection — needs to be requested through DOT, following the instructions on your notice or from DOT for your case. Keep your permit records, contractor paperwork, and before-and-after photos together so you can provide them if asked.
Do not assume the inspector will simply appear, and do not wait indefinitely to ask. If you are unsure how to request the inspection for your notice type, contact DOT and ask — requesting it the right way, for the right property and violation, is what puts your completed repair in front of an inspector who can act on it.
When you request the dismissal inspection through NYC311, have these details ready — DOT asks for all of them:
- Your sidewalk permit number
- The property address
- The block and lot number
- The violation number
- The property owner’s email address and phone number
Before the inspector arrives, make sure the entire sidewalk is visible and clear — no debris, materials, or parked equipment on the flags being checked. An inspector who cannot see the work cannot pass it.
Step 8: What Happens at Re-Inspection — and How the Violation Is Closed
At the re-inspection, the DOT inspector examines the repaired sidewalk and compares it with the defects cited on the original notice. The inspector is checking that each cited condition has been corrected, that the new work meets DOT specifications for things such as level, grade, and joints, and that no new hazard has been created in the process.
If the work passes, the violation is dismissed and closed — that dismissal is the outcome this whole process is aimed at, so keep the confirmation with your property records. If the inspector finds a remaining problem, you will be told what still needs attention; correct that item and go through the inspection request again. A failed first inspection is disappointing, but it is usually a specific, fixable issue rather than a reason to start over.
One distinction catches owners out: dismissal and liens are separate. If the City already stepped in, did the repair, and billed you, that charge can sit on the property as a lien — and dismissing the violation does not remove it. Clearing a City repair charge is a separate step, handled through the County Clerk’s office where the violation was filed. If your property has an old charge attached to it, ask DOT and the Clerk’s office what remains open rather than assuming the dismissal closed everything.
If the violation looks wrong: re-inspection and appeals
Sometimes the notice itself is the problem — the cited defect does not match the sidewalk, the dimensions or frontage are wrong, or the violation names the wrong owner. Do not ignore it and do not repair work that was never defective. Compare the notice against DOT’s Preliminary Inspection Report for your property, checking the frontage dimensions and the location of trees, signs, utility covers, and cellar doors. If the details do not match, you can appeal through NYC311 and request a re-inspection, in which a different inspector examines the sidewalk without seeing the first report. Wrong-owner violations can also be corrected through 311 with proof of ownership. Act inside the 75-day window so the appeal is on record before the City treats the violation as unaddressed.
Common Mistakes That Delay Dismissal
Most delays are not caused by the concrete. They are caused by process errors like these:
- Repairing before you have read the notice, then fixing a defect that was not cited while missing one that was.
- Starting work without the DOT permit in place.
- Assuming City tree damage is yours to fix — or cutting roots or a tree without going through the City.
- Patching or grinding a flag that needed full replacement, or finishing at the wrong grade so a lip remains.
- Hiring on price alone, without asking whether the contractor works to DOT specifications and handles re-inspection.
- Finishing the repair and never requesting the dismissal inspection, so the violation stays open on the record.
- Throwing away the notice, permit, photos, or paperwork before the violation is confirmed closed.
The Bottom Line for Property Owners
Getting a sidewalk violation dismissed is a sequence, not a single event: read the notice, document the condition, check the tree question, scope and permit the repair properly, build it to specification, and then have DOT verify and close it. Handled in that order, each step supports the next — and the dismissal at the end is simply the City confirming that the work was done right.
If you are budgeting for the repair itself, our guide to sidewalk replacement cost in NYC and Westchester explains what drives the price. And if you would like a contractor to walk your frontage, review your notice, and handle the process with you, Spark Restoration Inc serves property owners across New York City and Westchester — see the neighborhoods we cover on our service areas page, then get in touch for a free on-site estimate.